

Installation GuideAU-1 Window & Door
AU-1 Window & Door
Sealant Installation Guide
Learn how to seal windows and doors like a pro with AU-1. Step-by-step guide for durable, paintable, low-VOC caulking.
Video Tutorial
Watch the Installation Process
Follow along with our step-by-step video guide for professional window and door caulking.
Caulking or sealing around the exterior of a new window or door installation may seem straightforward, but it requires careful consideration to achieve a professional-level result. This installation guide provides step-by-step instructions to ensure an efficient and durable seal that not only looks great but also withstands the elements.
Choose the Right Caulk
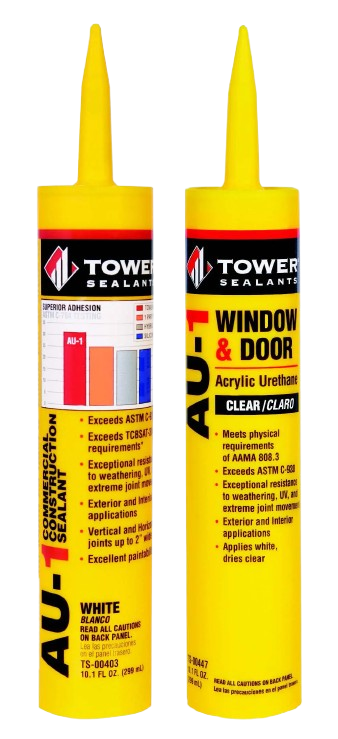
Selecting the appropriate caulk is crucial for sealing exterior windows and doors. Look for a caulk specifically designed for outdoor use.
- ASTM C-834Standard testing method for latex sealants that assesses low-temperature performance and weathering resistance. Suitable for mild climates.
- ASTM C-920 Class 12.5 or Higher (Recommended)More rigorous testing method that measures expansion/contraction capabilities for superior performance.
Substrates
Vinyl, fiber cement, brick, stucco, and more
Paintability
Ensure compatibility if painting is required
Plasticizers
Can cause discoloration or mold if they leach
Clean-up
Waterborne: soap & water; Others: solvents
Why Choose AU-1?
- Passes ASTM C-920 Class 35 for superior performance
- Durable, paintable, and plasticizer-free
- Low VOC emissions with easy soap and water cleanup
- Superior adhesion and UV resistance
- Adheres to most common building substrates
- Safe for interior use without odors or solvents
Clean the Area
Before applying the caulk, thoroughly clean the area around the window using soap and water to remove dirt, dust, or debris. Ensure that any oils or contaminants are completely wiped off the surface. Allow the area to dry completely before proceeding.
Temperature Requirements
Take note of the outside temperature, ensuring that both the air and surfaces will stay:
- Minimum
- Maximum
Weather Caution
Check the forecast and avoid applying sealant before heavy rain or extreme weather conditions.

Apply the Caulk
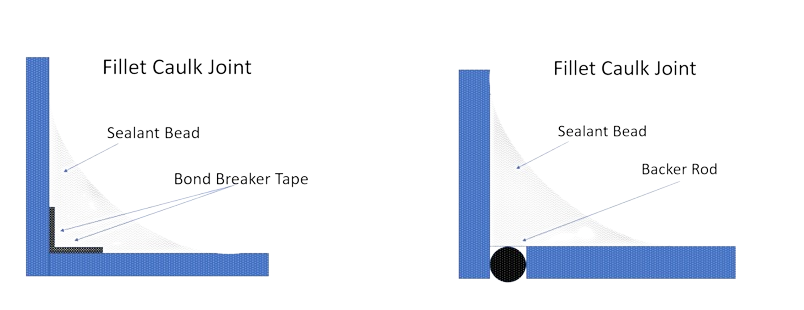
Backing Material (Prevents 3-Point Adhesion)
To prevent 3-point adhesion and allow for maximum flexibility, it is necessary to install a backing material:
Recommended: Backer Rod
Use an open or closed-cell, circular backer rod that fits the joint walls
Alternative: Bond Breaker Tape
Use if joint depth does not allow for backer rod installation
Using a caulking gun, apply a continuous bead of caulking around the window perimeter, ensuring that the sealant is in contact with both substrates and fills any gaps or cracks. Maintain a steady hand and apply even pressure to achieve a smooth and consistent bead.
Tool the Caulk Bead
Timing is Critical
After applying AU-1 Sealant, it is recommended to tool the caulk within:
- Tooling Window
Tooling Technique
Use a flat tool to ensure the joint is tooled flat or flush with the substrate. AU-1's evaporative cure, along with flat tooling, will create an ideal, concave joint.
Minimum Size for 90° Fillet Joints
After tooling: 3/8"

Allow the Sealant to Dry
The drying time for AU-1 may vary depending on humidity and weather conditions.
At 50% Relative Humidity and 75°F
- Tack-free
- Paintable
Do Not Disturb
Avoid touching the caulk during this time, as it may smear or pull away from the window.
Paint over the Caulk
Excellent Paint Compatibility
- Compatible with almost all acrylic exterior paints
- No primer required
- TOWER Sealants continuously tests compatibility with all paints
Questions about compatibility? Contact us at tech@towersealants.com
Conclusion
By following these simple steps, you can ensure that your new caulk for window installation is properly sealed and weather-resistant. Remember to choose the right caulk (AU-1), clean the area thoroughly, apply the caulk carefully, tool it properly, and allow it to dry before painting or exposing it to the elements.