
A liquid-applied barrier only performs as well as the film it cures into. Every benefit of the category, no seams, no laps, continuous air and water protection, depends on one thing happening correctly on every wall of every home: the membrane has to reach and hold the specified wet mil thickness across the entire surface, with no pinholes and no thin spots. Get that wrong and the seamless advantage disappears, because a barrier applied too thin is not a continuous membrane. It is a coating with gaps in it that nobody can see until the water finds them.
This is the detail that separates a liquid-applied barrier that performs for decades from one that fails within a season, and it is also the detail most likely to vary across a production schedule, from crew to crew, house to house, and even wall to wall on the same home. This guide focuses specifically on coverage, thickness, and the field verification steps that confirm the membrane was actually applied correctly, using Tower AU-1 LAB as the reference product. For the general step-by-step sequence of surface prep, seam treatment, and opening detailing, see the companion install guide; this post goes deeper on the thickness and quality control side of the same job.
| Quick Answer |
|---|
| A mil is one-thousandth of an inch, not a millimeter. Tower AU-1 LAB is applied at a minimum of 30 wet mils (0.030 inches), and can be built up to 60 wet mils without sagging on more porous substrates. At 30 wet mils, coverage is approximately 50 square feet per gallon, though actual coverage varies with substrate porosity and application method. Thickness must be verified with a wet mil gauge during application, not estimated by eye; a membrane you can see the substrate through is under the minimum. Spray application requires back-rolling immediately after to eliminate pinholes and even out coverage. Allow the product to become tack-free, approximately 60 minutes at standard conditions, before installing windows, doors, or cladding into the treated opening. Coverage and thickness verification should be a checked step on every home, not an assumption based on how the crew usually applies it. |
What “Wet Mil” Actually Means
Before getting into coverage rates, it helps to be precise about the unit. A mil is not a millimeter. A mil is one-thousandth of an inch (0.001 inch), a standard measurement in the coatings and waterproofing industry. Thirty wet mils is thirty one-thousandths of an inch, or 0.030 inches, roughly the thickness of a few sheets of paper stacked together. It is a small number that is easy to misjudge by eye, which is exactly why it has to be measured rather than estimated.
The word “wet” is doing real work in that phrase too. Wet mil thickness is measured immediately after application, while the product is still liquid. AU-1 LAB has a volume solids content of approximately 53 percent, meaning roughly half of the wet film’s volume is water and other components that leave the film as it cures. The cured, dry thickness ends up meaningfully less than the wet thickness applied. This is normal for the product category and is already accounted for in the specified 30 wet mil minimum. The number to hit in the field is the wet mil reading at application, not a guess at what the final dry film will measure, which is why a wet mil gauge, used immediately after the coat goes on, is the correct tool for the job.
Why Thickness Is the Whole Job
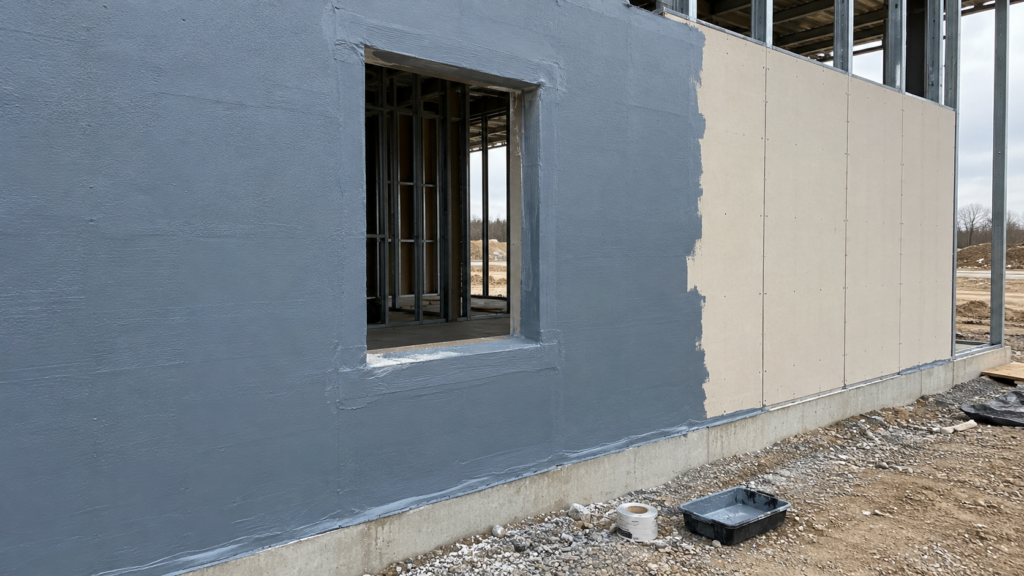
A liquid-applied barrier’s core advantage over housewrap and tape is that it cures into one continuous film with no seams. That advantage only exists if the film is actually continuous, which means no pinholes, no thin patches, and no areas where the substrate shows through. A membrane applied under the specified minimum thickness is not a defective version of a continuous barrier. It is not a continuous barrier at all. It behaves more like a spotty coating than a monolithic membrane, and it fails at exactly the thin spots and pinholes that thickness verification is designed to catch.
For AU-1 LAB, the minimum is 30 wet mils. The product can be built up to 60 wet mils without sagging when substrate porosity absorbs more material, which matters because porous substrates like CMU, brick, and some sheathing will pull more product out of a given coat than a smooth, dense surface will. The range exists precisely because coverage is not one-size-fits-all across substrates, which is exactly why eyeballing thickness does not work.
Measuring Thickness in the Field
Wet mil thickness is measured while the product is still wet, immediately after application, using a wet mil gauge. This is a simple, inexpensive tool, a notched or comb-style gauge pressed into the wet film that shows which notches picked up material and which did not, giving a direct reading of the applied thickness. Tower offers AU-1 LAB branded wet mil gauges, so if your crews do not already carry one, ask the Tower Sealants team for them.
Check thickness at multiple points across each section as it is applied, not just once per wall. Corners, edges, and areas around fasteners and penetrations are the spots most likely to run thin, because they are harder to coat evenly than a flat, open span of sheathing. These are also the areas most likely to develop pinholes, so they deserve extra attention during both application and verification, not less.
The simplest field check, and the one that should never replace a wet mil gauge but is a useful gut check, is visibility. If the substrate, the sheathing grain, the CMU texture, is visible through the membrane, the coating is under the minimum thickness at that spot. A continuous, correctly applied film should not let you see through to what is underneath.
Calculating Coverage and Material Needs
At 30 wet mils, AU-1 LAB covers approximately 50 square feet per gallon. That figure is the baseline for material takeoff, but it moves with two variables: substrate porosity and application method.
- Porous substrates use more material. CMU, brick, and some sheathing surfaces absorb product into the surface texture, which pulls coverage below the baseline rate for a given wet mil thickness. Budget extra material on masonry and precast applications rather than ordering to the smooth-substrate coverage rate.
- The application method affects consistency more than raw coverage. Spray application lays down material fast but is prone to uneven thickness and pinholes if it is not back-rolled immediately afterward. Roller and brush application is slower but easier to gauge visually as you go. For a production schedule, spray plus back-roll is typically the practical choice, but the back-rolling step is not optional; it is how spray-applied coverage actually reaches a consistent, pinhole-free film.
Spray Application Settings
For airless spray equipment, AU-1 LAB is applied with a recommended tip orifice size of .021 to .025, at 3000 PSI, with a flow rate of 1.15 to 2.5 gallons per minute. Back-roll immediately after spraying using a minimum 3/4-inch nap roller to work the material evenly and close any pinholes the spray pattern left behind. Spraying without back-rolling is the single most common cause of an under-thickness membrane on a sprayed wall. Full equipment specifications are listed on the AU-1 LAB technical data sheet.
Coverage at Rough Openings and Transitions
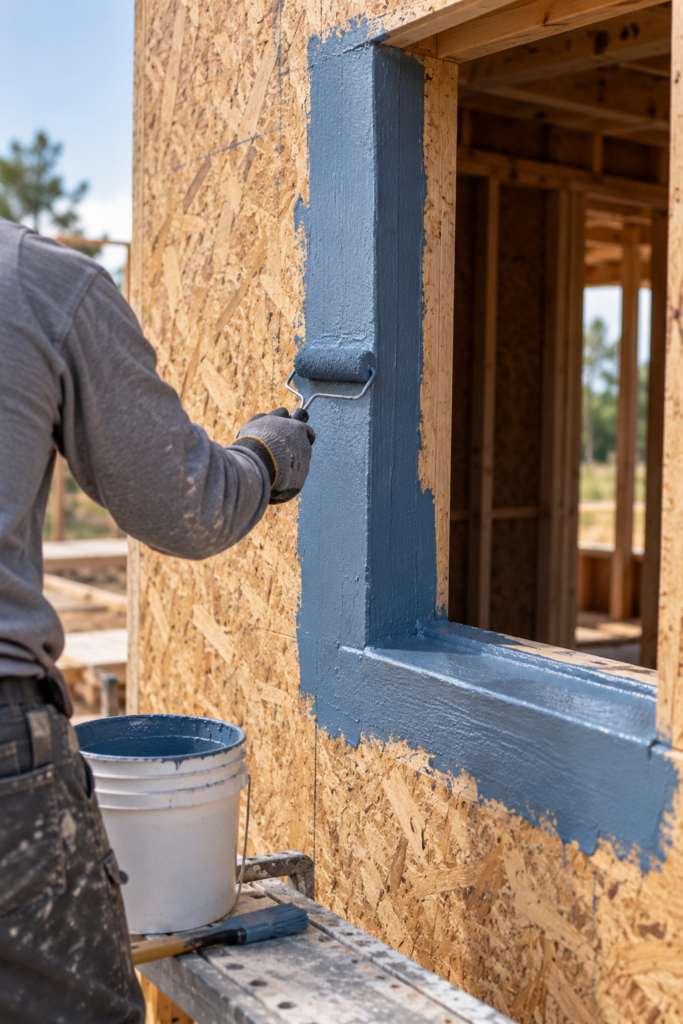
Rough openings and material transitions have their own coverage targets, separate from the field application rate, because these are the areas where flashing continuity matters most. That holds even when AU-1 LAB is not covering the whole wall. On many projects it is used as a liquid-applied flashing at the rough openings only, while the broad walls still use housewrap or another building envelope method, which is also a common way crews start with the product. Either way, the opening and transition coverage has to be right.
At a rough opening, extend the membrane a minimum of 4 inches onto the exterior sheathing surface around the perimeter. At transitions between different materials, whether that is sheathing to a window buck, sheathing to CMU, or any change in substrate, extend the membrane with a minimum 2-inch overlap onto the adjacent material. These extension minimums exist because a barrier that stops exactly at the edge of an opening or a material change leaves the actual transition point, the place most likely to move and most likely to see water, uncovered.
Seam Prep on Sheathing: Two Accepted Methods
Before the field coat goes on over OSB, plywood, or gypsum sheathing, board seams and any gaps larger than 1/4 inch need to be sealed. There are two accepted methods, and consistency across a production crew matters more than which one you pick.
- Option 1, recommended: Apply a generous bead of AU-1 Commercial Sealant into the board seams and gaps and strike it flush. Allow the sealant to become tack-free before applying AU-1 LAB over the area.
- Option 2: Trowel AU-1 LAB over the seams and corners first, embed a compatible mesh tape securely into the wet membrane, then trowel additional AU-1 LAB over the tape so it extends a minimum of 1 inch beyond each edge of the seam. Allow this to become tack-free before coating the full exterior surface.
Either method needs to be checked for an even coat with no pinholes before the crew moves on to the full-field application. Sheathing fasteners should sit flush with the surface; any fastener that is proud or sunk relative to the sheathing should be sealed with AU-1 Commercial Sealant before the membrane goes over it, since a fastener sitting at the wrong depth is a spot where the membrane thickness over it becomes unpredictable.
Common Coverage and Thickness Mistakes
- Estimating thickness by eye instead of measuring it. A film that looks even can still be under the 30 wet mil minimum in spots, especially at corners and edges. Use a wet mil gauge, every wall, not just when something looks off.
- Spraying without back-rolling. Spray application alone leaves pinholes and uneven thickness. Back-rolling immediately after spraying is required, not optional, to get a continuous film.
- Under-ordering material for porous substrates. Budgeting to the smooth-surface coverage rate on a CMU or precast job leaves the crew short mid-application, which tempts a thin final coat to stretch the remaining material.
- Skipping the corner and edge check. These areas run thin more often than open wall sections and deserve deliberate extra attention, not the same pass as the rest of the field.
- Installing windows or cladding before the membrane is tack-free. Pressing a window flange or cladding into a wet membrane displaces the coating at the most critical spot in the whole application. Confirm tack-free with a light touch test rather than relying on a fixed clock time alone, since humidity and temperature shift it.
- Treating coverage rate as a fixed number regardless of substrate. Porosity changes how much material a given wet mil thickness actually requires. A coverage rate is a planning estimate, not a guarantee, and it should be checked against actual thickness readings as the job proceeds.
A Field Verification Checklist for Production Crews
For a production schedule where the same detail repeats across many homes, verification has to be a checked step, not an assumption. A short field checklist keeps this consistent regardless of which crew is on site.
- Confirm substrate is clean, dry (or appropriately green-concrete rated), and within the application temperature range before starting.
- Confirm board seams and any gaps larger than 1/4 inch are sealed using one of the two accepted methods and are tack-free before the field coat begins.
- Check wet mil thickness with a gauge at multiple points per wall section, with extra checks at corners, edges, and around fasteners.
- Visually inspect for pinholes or see-through spots across the entire coated surface, not a sample area.
- Confirm rough opening extension meets the 4-inch exterior and 2-inch transition overlap minimums.
- Confirm tack-free status with a light touch test before installing windows, doors, or cladding.
FAQ: Coverage and Thickness for Liquid-Applied Barriers
What does “wet mil” mean, and is that millimeters?
No, a mil is one-thousandth of an inch (0.001 inch), a standard unit in the coatings industry, not a millimeter. Thirty wet mils equals 0.030 inches measured while the product is still liquid, immediately after application. The final cured thickness will be less than the wet reading because the product loses volume as it cures, which is already factored into the 30 mil minimum.
What is the minimum wet mil thickness for AU-1 LAB?
30 wet mils (0.030 inches) is the minimum. The product can be built up to 60 wet mils without sagging on more porous substrates. Thickness should be confirmed with a wet mil gauge during application rather than estimated visually.
How much coverage do I get per gallon?
Approximately 50 square feet per gallon at 30 wet mils. This figure varies with substrate porosity and application method, so budget extra material for porous substrates like CMU, brick, and precast.
How do I know if I applied enough material?
Use a wet mil gauge during application, checked at multiple points including corners and edges. As a secondary visual check, a correctly applied membrane should not let the substrate show through. If you can see the sheathing or block texture, that spot is under thickness.
Is back-rolling required after spray application?
Yes. Spray application alone tends to leave pinholes and inconsistent thickness. Back-rolling immediately after spraying, with a minimum 3/4-inch nap roller, is required to achieve a consistent, pinhole-free film.
How long before I can install windows or cladding after applying the membrane?
Wait until the membrane is tack-free, approximately 60 minutes at standard conditions, though this varies with temperature and humidity. Confirm with a light touch test rather than relying on time alone.
Does coverage rate change based on the substrate?
Yes. Porous substrates such as CMU, brick, and some sheathing absorb more material to reach the same wet mil thickness, which reduces the square footage covered per gallon relative to a smooth, dense surface. Treat published coverage rates as a planning baseline, not a substrate-specific guarantee.
Conclusion: Coverage Is a Quality Control Step, Not an Estimate
The seamless, continuous advantage of a liquid-applied barrier only exists if the membrane actually reaches the specified thickness everywhere on the wall. Applying it correctly is a matter of measurement, not habit: a wet mil gauge at multiple points per wall, back-rolling after spray application, extra attention at corners and transitions, and correct extension at rough openings. Treat these as verification steps that get checked on every home, not assumptions based on how a crew usually applies it.
Tower AU-1 LAB is built for this kind of production consistency, applied at a minimum of 30 wet mils and up to 60 without sagging, with a straightforward path to verifying coverage in the field. For the full application reference, see the AU-1 LAB Application Guide. Getting the thickness right on every home is what turns the material’s advantages into a wall that actually performs.
For application training or to confirm coverage rates for a specific substrate or program, contact the Tower Sealants team. Visit towersealants.com or call 866-897-7568.